Generating and Saving Transcripts From the Terminal
Before You Start
Before you run the code, you’ll need to do a few things.
Create a Deepgram Account
Before you can use Deepgram, you’ll need to create a Deepgram account. Signup is free and includes $200 in free credit and access to all of Deepgram’s features!
Create a Deepgram API Key
Before you start, you’ll need to follow the steps in the Make Your First API Request guide to obtain a Deepgram API key, and configure your environment if you are choosing to use a Deepgram SDK.
Install JQ
In this guide, we use jq, which is an excellent command-line utility that allows you to display and manipulate JSON data, so you will also need to install jq.
Making a curl Request
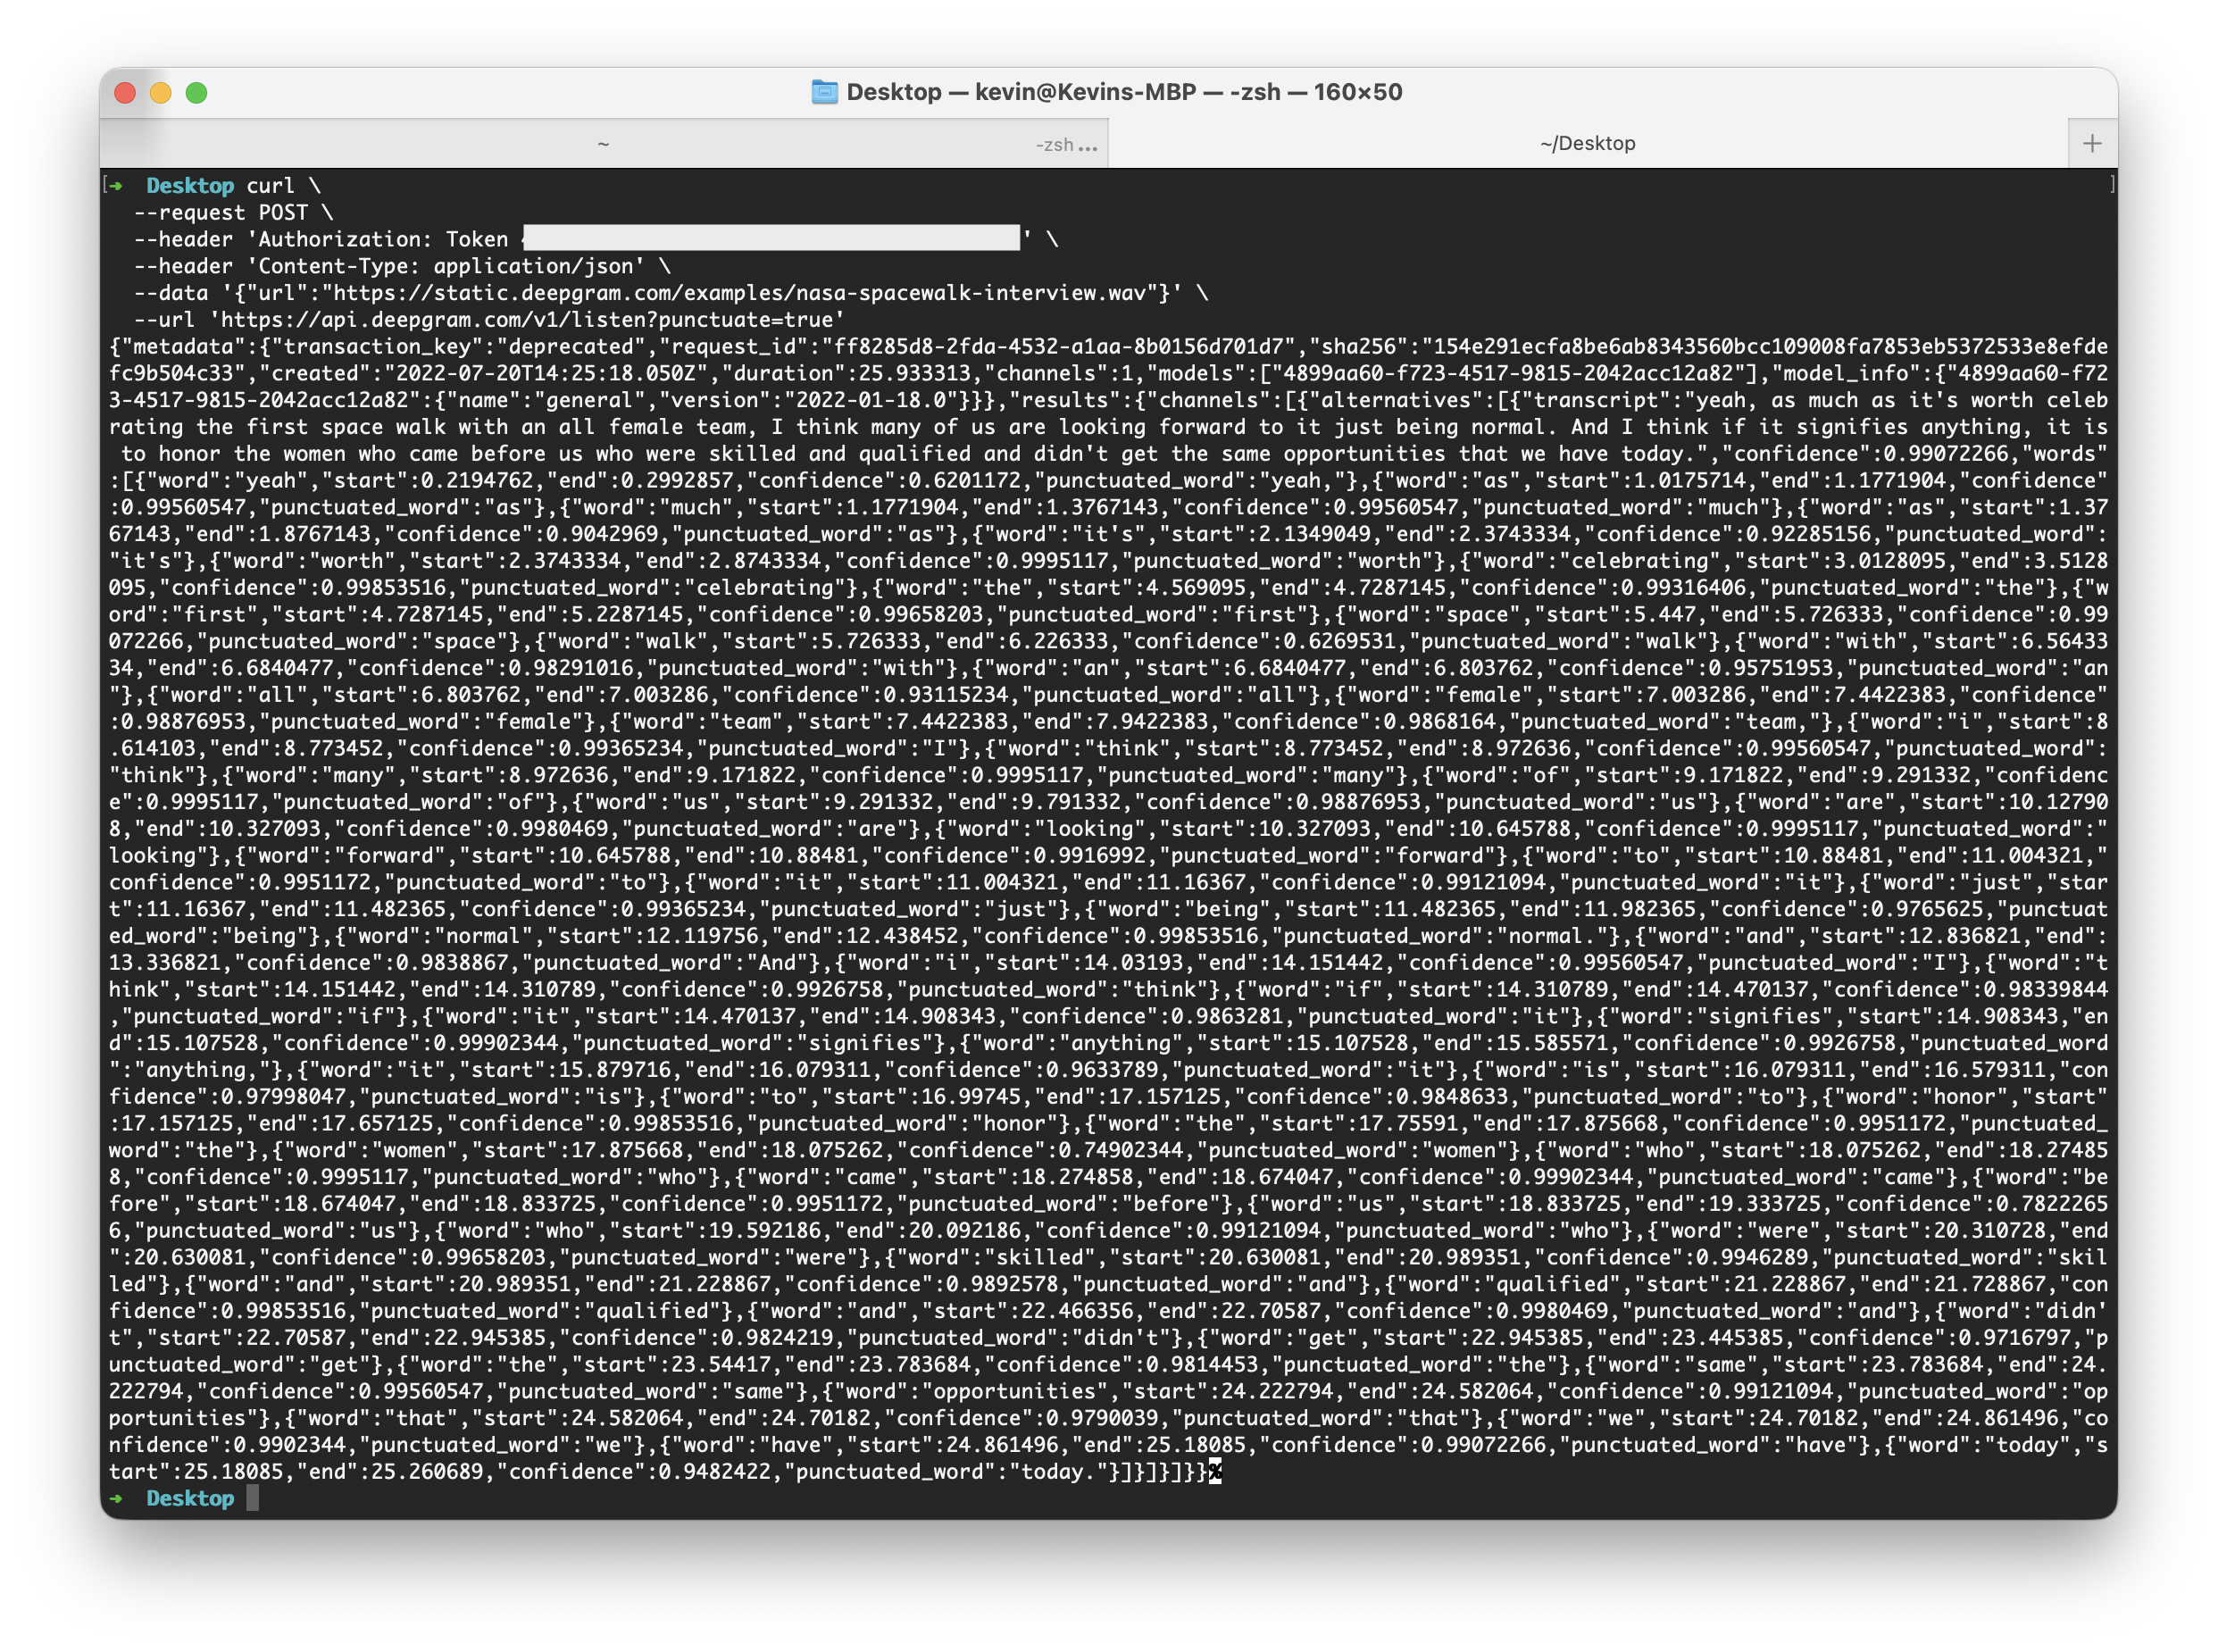
Open your terminal, and run the following curl command:
Replace YOUR_DEEPGRAM_API_KEY with your Deepgram API Key.
Let’s look more closely at this request:
--request POST: An HTTP request with the POST method.--header 'Authorization: Token YOUR_DEEPGRAM_API_KEY': Includes authorization details and links the request with your Deepgram account and Project.--header 'Content-Type: application/json': JSON data that will be sent with this request.--data '{"url":"<https://static.deepgram.com/examples/nasa-spacewalk-interview.wav>"}': JSON data sent to Deepgram (an object containing one URL parameter).--url 'https://api.deepgram.com/v1/listen?punctuate=true': URL to which the request should be made (Deepgram’s endpoint).punctuate=trueenables the punctuation feature.\: Allows you to break one command over several lines for readability.
When you run this command and it is finished processing (often after only a few seconds), you’ll receive a JSON response that looks similar to the following:
This may look daunting, so let’s look at a way to make both our curl request and our response easier to read.
Shortening Your curl Request
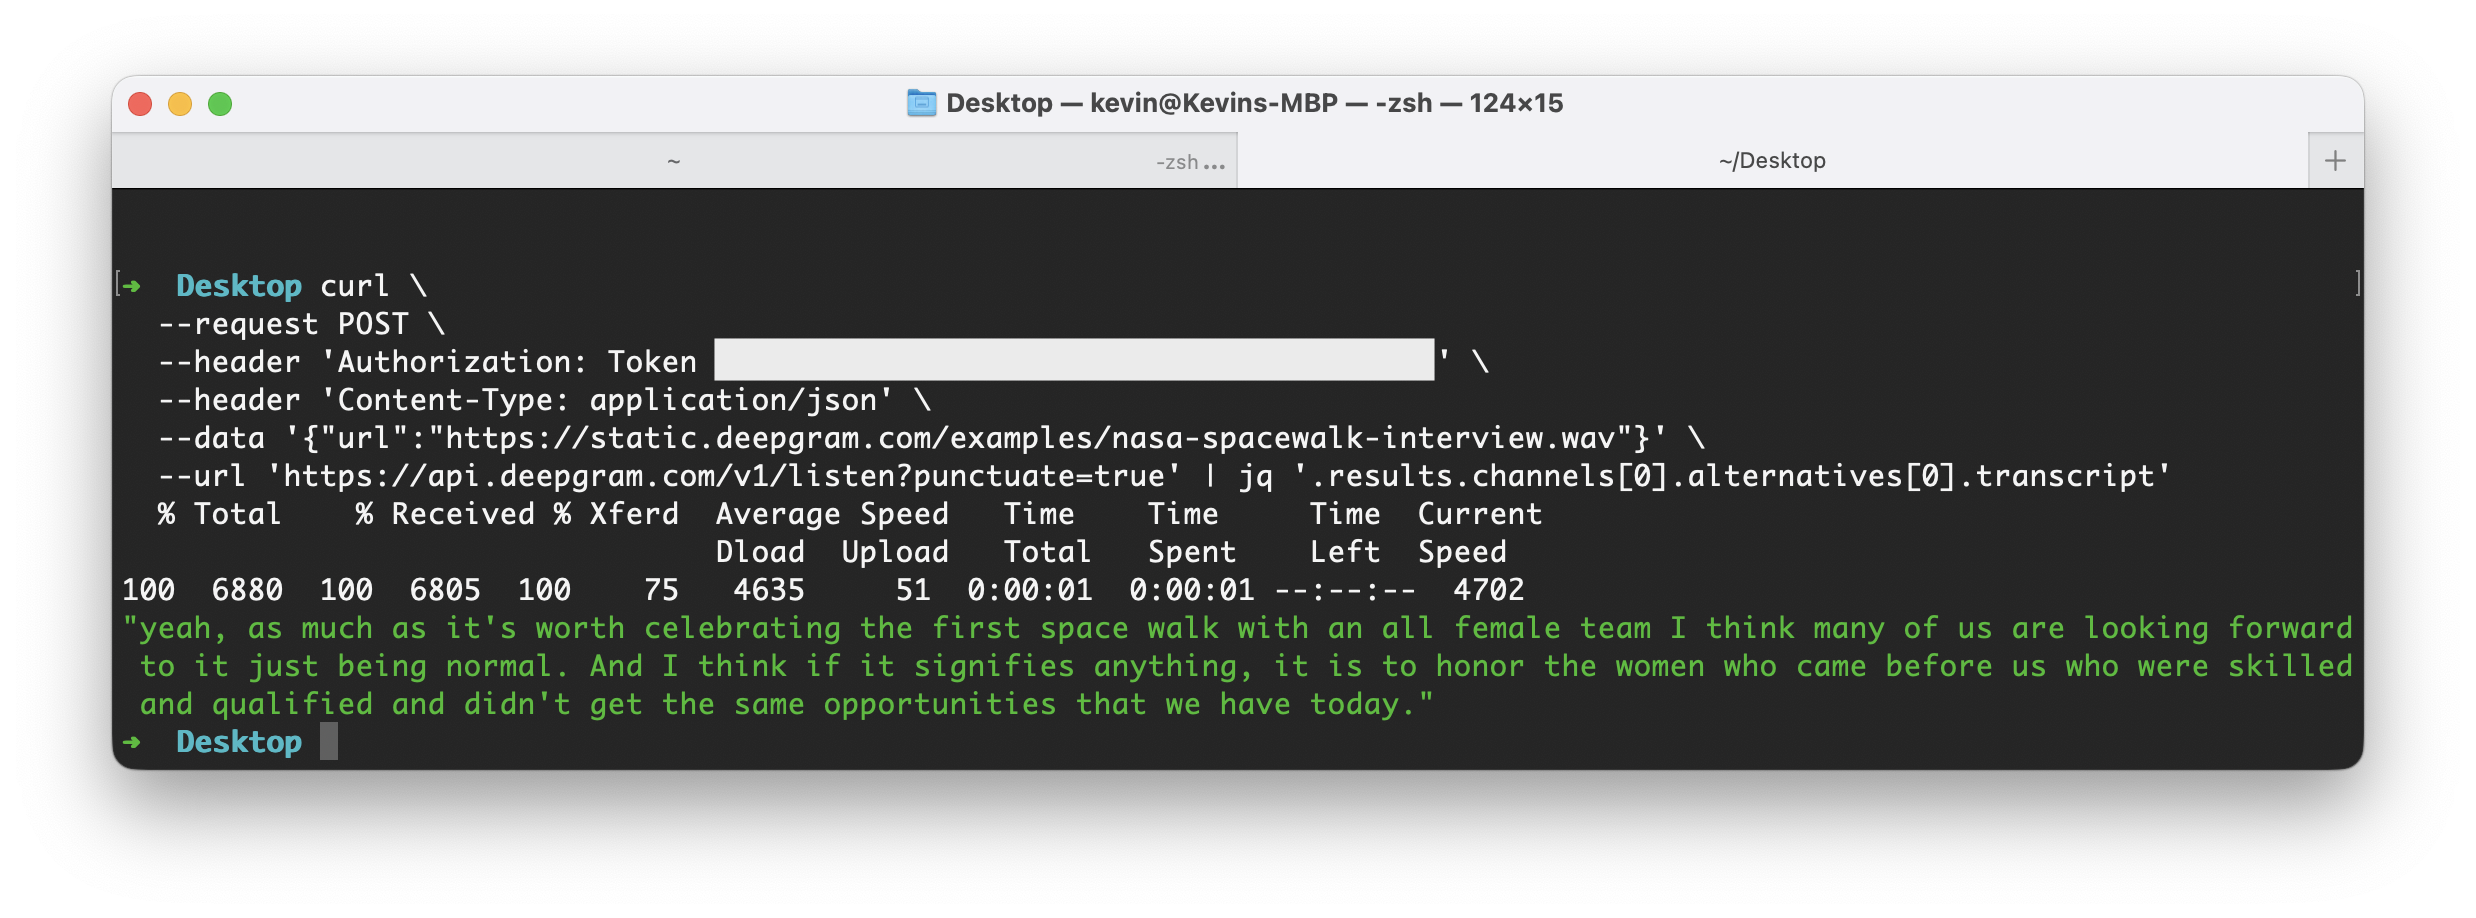
Now that you’ve seen a full curl request and understand the required parameters, let’s look at a more concise way to make the same request:
In this example, notice:
- The URL comes immediately after the
curlcommand. - No HTTP method is present. Normally, this would default to a GET request, but because this request has a body, curl assumes a POST request.
--headeris shortened to-H--datais shortened to-d.
Formatting Your JSON Response
To make the JSON response more readable, you can use jq, which is an excellent command-line utility that allows you to display and manipulate JSON data.
In the terminal, a pipe (|) is often used to send the output of one command as an input for a second command. jq expects some JSON as input, plus an expression to describe how to display it.
The following jq expression will extract just the transcript from the returned data object:
| jq '.results.channels[0].alternatives[0].transcript'
To use it, add it to the end of your curl request:
Replace YOUR_DEEPGRAM_API_KEY with your Deepgram API Key.
When you run this command and it is finished processing (often after only a few seconds), you’ll receive a JSON response that looks similar to the following:
Saving Output to a File
Once you have the transcript extracted and formatted using jq, you can redirect the output to a new file by appending > output.txt to any command that prints to the terminal. For example:
Processing Multiple Files
To process multiple files, you can create .sh files containing multiple lines of bash script to execute from your terminal.
Create a new file called transcripts.sh, and open it in a code editor. Populate it with the following:
Replace YOUR_DEEPGRAM_API_KEY with your Deepgram API Key.
In this file, notice:
-
The first line (
#!/bin/bash) is a shebang and specifies which program should be called to run the script. In this case,bash. -
urlsis a variable containing an array with three URLs. The arrays use parentheses, and items are separated by only one space. -
dg_featuresanddg_keyare variables you should alter for your exact use case. Note that the request, as written, uses Deepgram’s punctuation, utterances, diarize, and tier features included in thedg_featuresvariable. -
Inside the
forloop:filenameextracts the last part of the URL (the filename), which will later be used to name the output file.- The
curlcommand is the same as before, but with variables interpolated. The output is stored in a new variable calledRESPONSE. RESPONSEis sent tojq, and then redirected into a new text file.
Run the file in your terminal:
Experimenting with jq
jq is a remarkable powerful tool that you can use to format data in more advanced ways. For example, the following expression will loop through the results.utterances array and format a string for each item, interpolating the speaker identifier and transcript text:
When you run a previous curl command with this jq appended and it is finished processing, you’ll receive a JSON response formatted in the following way: